Sunday, 6 May 2012
Scrapbooking galore
Tuesday, 27 March 2012
Scrapbooking
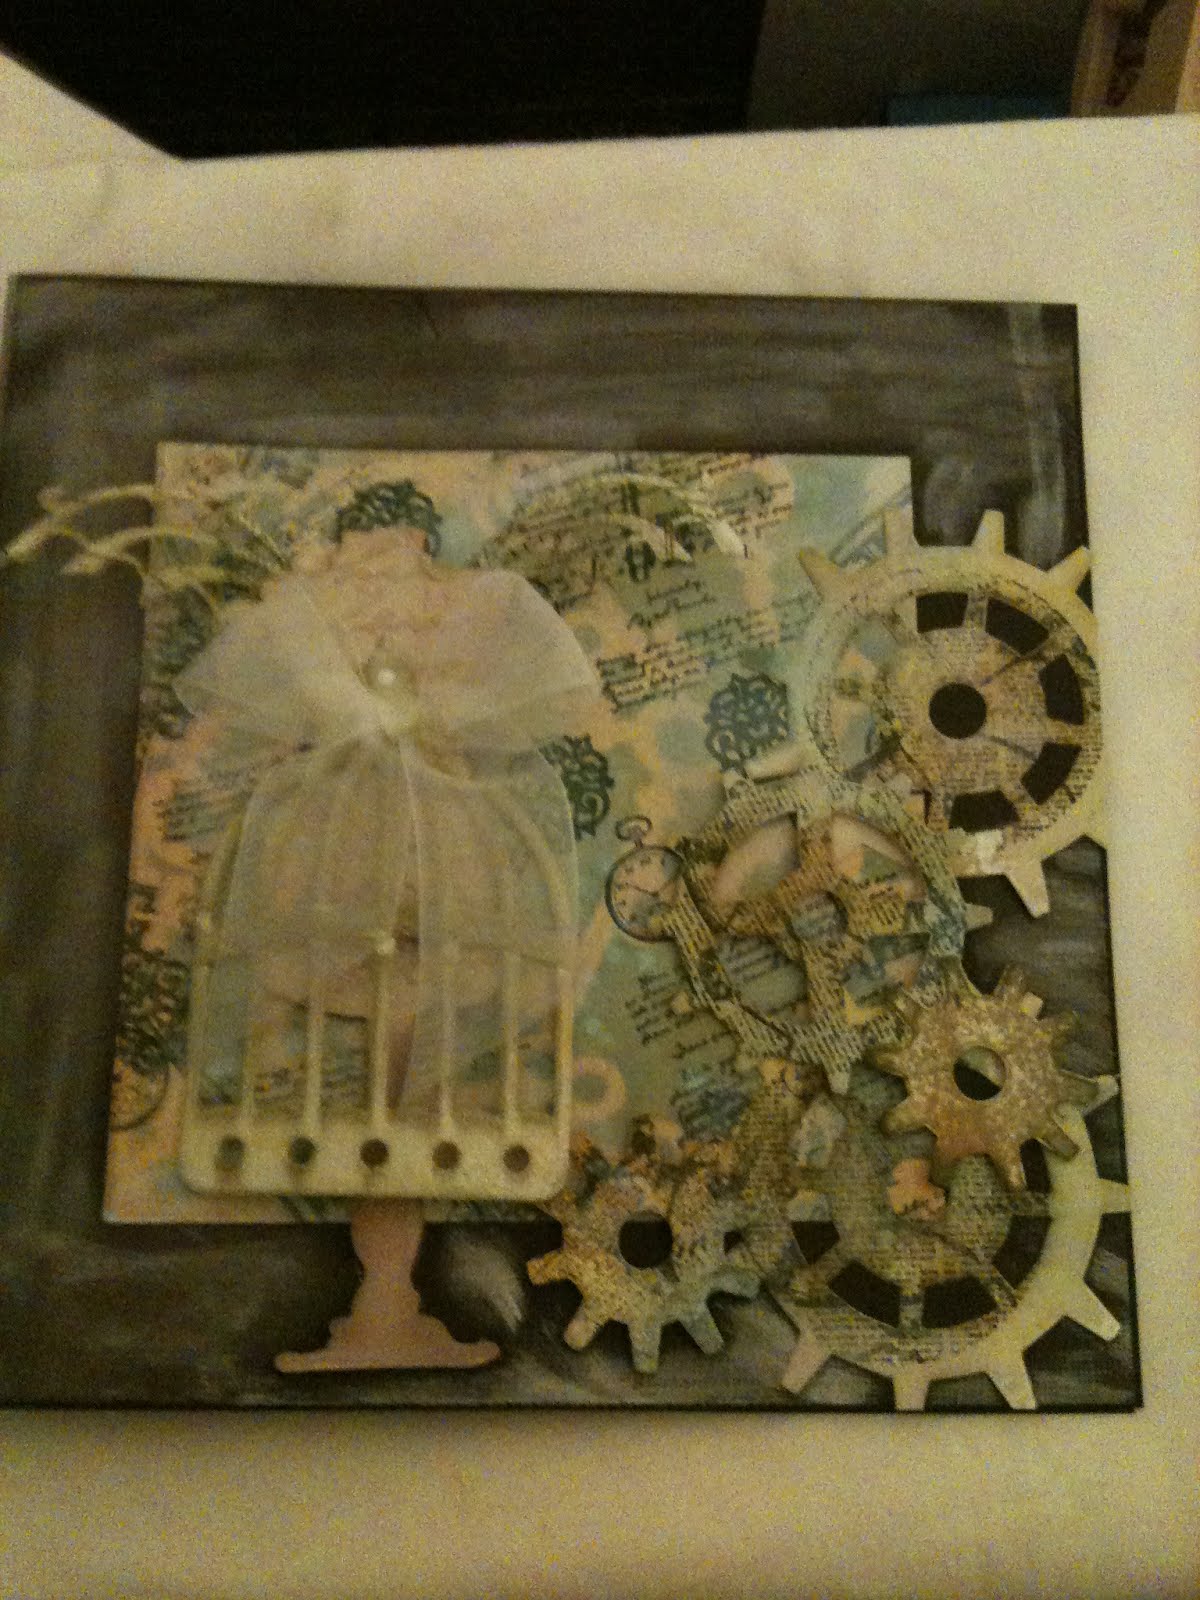
So we have had our first scrapbook crop and the layout above was the one we did in our mini worksho. Simple but effective. Love this photo it was a colour 6x4 photo taken about 11 years ago. I needed a 5x7 black and white so a quick visit to Staples and I had what I needed. The picture is of Maisie and I.
Sunday, 11 March 2012
Distressed card
Monday, 13 February 2012
New Class
So here I am on my holiday's I would like to say the weather is lovely and hot!!!, but it's the heat from our log fire.
So I have been busy I have booked a hall for our new class. What class is this I hear you ask!!
A SCRAPBOOK CROP.
The idea is you bring along your own scrapbook projects and we will crop together. I will also be doing a 12x12 page with you. So you will need to bring a 5x7 inch black and white feminine photo, portrait layout. Good photos for this would be daughter, grandaughter, etc.
The cost will be £15 inclusive.
Places need to be booked by 12th March
So I have been busy I have booked a hall for our new class. What class is this I hear you ask!!
A SCRAPBOOK CROP.
Due to popular demand I will be starting a crop on the 3rd Saturday of the month. The 1st will be.
Saturday 17th March 10am-4pm .
Jacket potatoes for lunch, teas and coffees included.
The idea is you bring along your own scrapbook projects and we will crop together. I will also be doing a 12x12 page with you. So you will need to bring a 5x7 inch black and white feminine photo, portrait layout. Good photos for this would be daughter, grandaughter, etc.
The cost will be £15 inclusive.
Places need to be booked by 12th March
Wednesday, 8 February 2012
Happy Anniversary
Tuesday, 24 January 2012
Recessed window card.
Recipe
Card stock.
Image or decoupage.
Paper for the inside
Paper or card for the outside.
Embelishments.
Sentiment.
Ruler.
Knife.
Pencil.
This card can be made any size you wish the one at the top of this post is an A4 the one at the bottom of this post is A5.
I will give the instructions for the A5 card it's quite simple to scale down.
1. Take a piece of A4 score at 14cm turn the card 180 degress and score at 14cm fold and use your bone folder to make a crisp fold.
2. Open the card and place it right side down.
3. Put your image in the desired place and draw round with a pencil.
4. Score on top of this line and then again 1cm inside the pencil line.
5. Place the ruler from the top left corner to the bottom right corner. Cut along this line. and repeat on the top right to bottom left.
6. Fold the triangles out on the outer score line and back in on the inner score line.
7. Place the card onto the front of the card and hold in place. Turn the card over and draw a pencil line around the hole.
8. Cut the hole out just outside the pencil line.
9. Stick the card to the front of the card and decorate.
10. Stick your image into the window.
11. Trim the off cut of card created from the window.
12. Use the off cut to cover the back of the image.
The A6 card had a piece of paper stuck to the insde of the card and was decorated with a stamped image in the bottom right hand corner.

Card stock.
Image or decoupage.
Paper for the inside
Paper or card for the outside.
Embelishments.
Sentiment.
Ruler.
Knife.
Pencil.
This card can be made any size you wish the one at the top of this post is an A4 the one at the bottom of this post is A5.
I will give the instructions for the A5 card it's quite simple to scale down.
1. Take a piece of A4 score at 14cm turn the card 180 degress and score at 14cm fold and use your bone folder to make a crisp fold.
2. Open the card and place it right side down.
3. Put your image in the desired place and draw round with a pencil.
4. Score on top of this line and then again 1cm inside the pencil line.
5. Place the ruler from the top left corner to the bottom right corner. Cut along this line. and repeat on the top right to bottom left.
6. Fold the triangles out on the outer score line and back in on the inner score line.
7. Place the card onto the front of the card and hold in place. Turn the card over and draw a pencil line around the hole.
8. Cut the hole out just outside the pencil line.
9. Stick the card to the front of the card and decorate.
10. Stick your image into the window.
11. Trim the off cut of card created from the window.
12. Use the off cut to cover the back of the image.
The A6 card had a piece of paper stuck to the insde of the card and was decorated with a stamped image in the bottom right hand corner.
Quadrupal twisted easel card
Recipe
1 8x8 square card
6 4x4 square cards
8 pieces of paper 3 3/4" square in 2 different colours.
Scraps of card for stamping onto.
Brown chalk ink.
Portabello Rd stamps
1. Fold the 8x8 card to make a gate fold.
2. With the 4x4 square cards make up into twisted easels.
3. Decorate the cards using the portabello papers and stamps.
4. Stick these to the flaps of the gatefold card.
It's that easy give it a try.
2 for 1 card
2 square cards I used anita's.
3 pieces of paper.
2 images.
sentiments and embellishments.
Scalloped square dies.
Masking tape.
Foam pads.
Die cutting machine.
1. Fold one card into a basic square card and the other into a gate fold.
2. Cover the inside of both cards.
3. Cover the front of the basic card.
4. Take the basic card open it flat and place the 2 largest dies onto the front of the card and pass threw your machine.
5. You now have a frame and a mat in paper and card stick the paper to the card.
6 . Stick one of the images into the aperture you have just created.
7. Finish off with sentiments and embellishments.
8. Take the gate fold card and close stick with masking tape the smaller of the 2 dies to the left of the fold.
9. Open the card out flat and pass threw your machine.
10. Close the card again and stick onto the right hand side. Now you can remove the tape fron=m the left.
11. Open flat and pass threw your machine.
12. Stick the frame to theleft front of your card using pads. Cut the frame and stick to the right hand side.
13. Finish off with sentiments and embellishments.
Sunday, 4 December 2011
Instructions for book card
Cut 2 pieces of card 5.75" x 5.25" emboss these and destress stitch the beads onto the front.
Stick the ribbon to the cover and then stick the embossed panels to the front.
Cut a piece of card 5.75" x 1.25" destress and stick to the outside spin.
This is the front cover before I destressed them The one on the left I bought from Hobbycraft the one on the right is a Docraft one. The dress form is a Tim Holtz.
Using wet glue stick a 4" piece and a 4.5" piece at a right angle.
Fold over left then right until you get to the top then stick with wet glue. Repeat with all the sides to for you square. Whilst still wet tap into place so it's square.
Stick a picture behind the concertina and then stick onto the inside cover again use wet glue.
The left hand side was decorated with an image from the net which I destressed. The lace panel was a piece of card cut 5"x 1.5" an off cut of the net image was stuck onto the card and a piece of lace stuck onto the panel this was then stuck to the inside cover.
The corner flowers were stuck with wet glue and I made a little pin. the bow was made from seam bonding which I bought from fabric land I sprayed it with water the splodged some ink on my glass cutting mat which I sprayed again I then rolled the ribbon into the inky mess. Dry it and then stamp with a black ink and the urban stamps.
Hope this helps.
Thank you Dave for the fab photos!!
Tuesday, 22 November 2011
Vintage cards
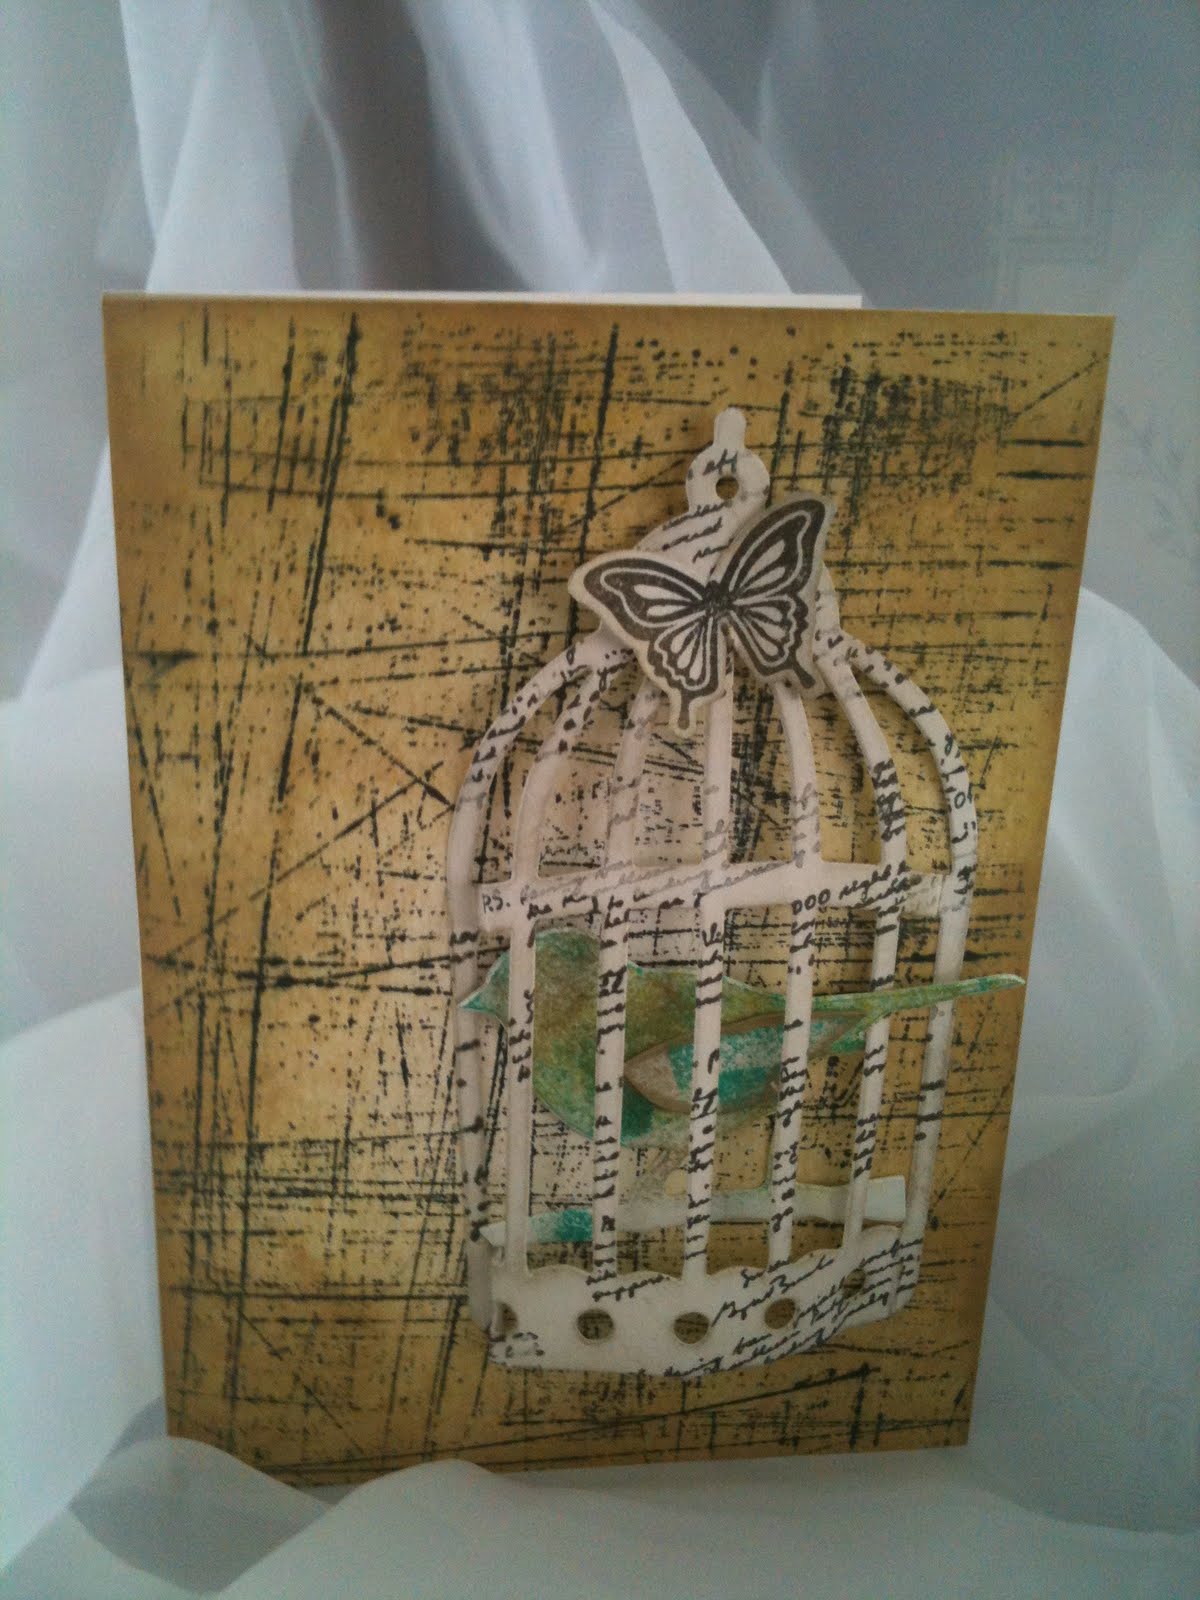
Tim Holtz bigz, bird cage die, gadget gears. Clocks and steampunk, and rays and retro circles embossing folder. Docraft urban stamps. The distressed lines on the card above are from a stampin up stamp up.
Class cards
Recipe
A4white card, A5 Black card,Kanban stamps, Black ink, glitter and thin outline sticker.
Recipe
Stamps from Kanban and coloured with promarkers. Blue card is from stampin up. Fits into an A5 envelope.
Monday, 14 November 2011
Snowman soup
White card, brown fluid chalks, Ironworks nesties the verse I was from tinternet, and the little snowman stamp is from Hobbycraft.
Saturday, 5 November 2011
Kanban christmas
Iam going to try and plan this so it shows on Sunday if its any other day I have got it wrong.
Never thought I would see the day I would be using Kanban but here it is.
Recipe
A Square card which I stamped the scroll in mementos black ink. The santa in the chair was stamped, coloured with promarkers and decoupage I glittered him with glamour dust used anita's 3D gloss for the boots and belt.
Tatty Ted
Oh I am cooking on gas now this is going to be blog over load Sorry.
A square card with a bit of matting and layering and a Tatty Ted wooden Stamprd image.
Recipe
The papers are all from the Tatty Ted ultimate decoupage pack. The blue and pink card is from Stampin up as is the punch tab on the side and the punched ovals in the corner. The wooden snowflake was from Hobbycraft. I did a bit of paper pricking in the corners as well. The image was coloured with promarkers.
So heres the inks
Inks
Oh there are so many out there but I have tried to give a list of the most popular. All the info I have given is from the internet. Here we go.
Tim Holtz® Distress Ink Pads
Tim Holtz Distress Inks are a collection of 36 acid-free, non-toxic, fade resistant, water-based dye inks. They’re perfect for the new vintage, stained, aged effect crafters are creating in their altered books, scrapbook pages, cards and paper craft projects. Tim selected the colour and helped develop these inks to produce a realistic, weathered look on paper, photos and decorative fibres. All the colourful Distress Inks afford added versatility when photo tinting and colour layering with the original, award winning tones. The 2" x 2" pads are made with a higher raised felt for easier use with direct to paper techniques, Re-inkers available in .5 oz. amber glass bottles with eye drop applicators.
For more info try here
http://www.rangerink.com/tips/tips_distress.htm
Adirondack® Dye Ink Pads
Rich, realistic Earthtones, pastel Lights and vibrant Brights for color-coordinating with the popular Adirondack product line. Raised above the case, our pad allows easy use of any size rubber image, brayer, or for direct-to-paper techniques.
For more info try here http://www.rangerink.com/tips/tips_adirondackPigmentInkPaperCrafting.htm
Memento™ dye ink is fast drying and fade resistant. The innovative pad delivers finer impressions and exceptionally even coverage and you can get the same great dye ink in a marker! Memento™ markers are dual tip - one end has a brush tip and the other a bullet tip. Memento products are available in 24 wonderfully fresh colors.
Stazon
StazOn is our only solvent-based ink, designed for decorating non-porous and semi-porous surfaces, such as metal, shrink plastic, acrylic, cellophane, aluminum foil, leather and some glass surfaces. Thanks to its mild smell, StazOn is much safer to use than other permanent inks. Wide mouth bottles are available for all 31 colors. For everything from industrial projects to home decor, StazOn is sure to remain the top crafting ink! Cleanup is easy with StazOn All-Purpose Cleaner. Use StazOn with our Sponge Daubers and Fantastix applicators for easy sponging techniques!
For ideas on how to use these check out You Tube there are some fab videos over there.
Oh there are so many out there but I have tried to give a list of the most popular. All the info I have given is from the internet. Here we go.
Tim Holtz® Distress Ink Pads
Tim Holtz Distress Inks are a collection of 36 acid-free, non-toxic, fade resistant, water-based dye inks. They’re perfect for the new vintage, stained, aged effect crafters are creating in their altered books, scrapbook pages, cards and paper craft projects. Tim selected the colour and helped develop these inks to produce a realistic, weathered look on paper, photos and decorative fibres. All the colourful Distress Inks afford added versatility when photo tinting and colour layering with the original, award winning tones. The 2" x 2" pads are made with a higher raised felt for easier use with direct to paper techniques, Re-inkers available in .5 oz. amber glass bottles with eye drop applicators.
For more info try here
http://www.rangerink.com/tips/tips_distress.htm
Adirondack® Dye Ink Pads
Rich, realistic Earthtones, pastel Lights and vibrant Brights for color-coordinating with the popular Adirondack product line. Raised above the case, our pad allows easy use of any size rubber image, brayer, or for direct-to-paper techniques.
For more info try here http://www.rangerink.com/tips/tips_adirondackPigmentInkPaperCrafting.htm
Memento™ dye ink is fast drying and fade resistant. The innovative pad delivers finer impressions and exceptionally even coverage and you can get the same great dye ink in a marker! Memento™ markers are dual tip - one end has a brush tip and the other a bullet tip. Memento products are available in 24 wonderfully fresh colors.
Stazon
StazOn is our only solvent-based ink, designed for decorating non-porous and semi-porous surfaces, such as metal, shrink plastic, acrylic, cellophane, aluminum foil, leather and some glass surfaces. Thanks to its mild smell, StazOn is much safer to use than other permanent inks. Wide mouth bottles are available for all 31 colors. For everything from industrial projects to home decor, StazOn is sure to remain the top crafting ink! Cleanup is easy with StazOn All-Purpose Cleaner. Use StazOn with our Sponge Daubers and Fantastix applicators for easy sponging techniques!
For ideas on how to use these check out You Tube there are some fab videos over there.
Not what I promised but
Card Organizer
To make this organizer first take a piece of white card 18cm x 29cm put this on your hougie board landscape style and score on 6cm, 11cm, 24cm
Take the white 18cm x 18cm and score on 13cm. Stick the 5cm panels over each over to form a piece of card 45cm long.
Take the 2 white 7cm x 11cm pieces and lay on your board portrait score on 1cm flip the card round and score 1cm this will create your side panels for your box. Stick these to the 13cm section leaving 1cm at the top and the bottom. Bring the other 13cm section and stick to the other side.
Stick the 16cm x 11cm hammered card to the 17cm x 12cm coloured card and stick this to the 13cm sections.
Take the 4cm x 16cm piece of hammered card and stick to the coloured card and stick this to the flap of the box.
Take the 3cm x 16cm piece of hammered card and cut 2 slits in the card 2cm from the end to put the ribbon through. Stick the ribbon to the reverse of the strip, stick this to the 4cm x 17cm piece of coloured card and stick to the top of the box.
Take a Velcro disc and stick to the flap of the box if you leave the 2 bits of Velcro stuck together and then stick to the front of the box they should line up o.k.
To make this organizer first take a piece of white card 18cm x 29cm put this on your hougie board landscape style and score on 6cm, 11cm, 24cm
Take the white 18cm x 18cm and score on 13cm. Stick the 5cm panels over each over to form a piece of card 45cm long.
Take the 2 white 7cm x 11cm pieces and lay on your board portrait score on 1cm flip the card round and score 1cm this will create your side panels for your box. Stick these to the 13cm section leaving 1cm at the top and the bottom. Bring the other 13cm section and stick to the other side.
Stick the 16cm x 11cm hammered card to the 17cm x 12cm coloured card and stick this to the 13cm sections.
Take the 4cm x 16cm piece of hammered card and stick to the coloured card and stick this to the flap of the box.
Take the 3cm x 16cm piece of hammered card and cut 2 slits in the card 2cm from the end to put the ribbon through. Stick the ribbon to the reverse of the strip, stick this to the 4cm x 17cm piece of coloured card and stick to the top of the box.
Take a Velcro disc and stick to the flap of the box if you leave the 2 bits of Velcro stuck together and then stick to the front of the box they should line up o.k.
The cards are A6 and the box will take at least 6 stamped cards and envelopes.
The cards I made for the box are Shadow stamp.
Cut a shape out of copier paper and place over the front of your A6 card using a ink distressing tool and fluid chalk ink apply the ink to the cut out area build up the colour gradually. Remove the paper.
Using the same colour ink up a simple stamp flowers work great and stamp over the chalked area.
Stamp your sentiment in the same colour.
An alternative to the above is to stamp the image in a black ink.
Friday, 4 November 2011
Inks and things
I will upload the info about inks next week. i have posted on my other blog the Docraft products next week I will cover the others. Have a nice week end.
It's been a while
Recipe
Card stock is stampin up glitter card from Docraft images are all Docraft and coloured with promarkers. The embossed area is done with one of the new embossing folders from Docraft. The 1st has been cut on my Cricut.
Recipe
The paper is infact card and was from the docraft jade kit. Your spoilt for choose as there are so many lovely ones to choose from. The image is a Trimcraft one and was coloured with promarkers. The flowers were all die cut with my marianne dies. The edges were chalked and finished with a pearl. The mats are from kanban.
I made a box for this one and decorated it with some flowers and swirls.
Recipe
For this card is Mirri card promarkers and sizzlet dies, and marianne dies. The flowers were all crimped and shaped.
I hand cut an easel scallop now I would use my xcut dies. The image is from the web sorry no files to tell you were it came from. I coloured it with my promarkers. The flowers and the letters are from Docraft. I coloured the letters with my permanent markers.
This card shape I found on the internet again I don't have the files for it if you know where it came from please let me know.
Recipe
Great hite card stock from Docrafts, the flowers were all cut with dies and punches. The message came from Docrafts. The image was coloured with promarkers and is on my missing files.
Subscribe to:
Posts (Atom)